I Tested the Rayhong Headlight Restoration Kit: A Step-by-Step Guide on How to Use It
I recently discovered just how much a simple headlight restoration kit can transform the look and safety of my car, and the Rayhong Headlight Restoration Kit quickly became my go-to solution. If you’ve ever struggled with foggy, yellowed headlights that dim your nighttime driving, you know how frustrating it can be. In this article, I want to share my experience and insights on how to use the Rayhong Headlight Restoration Kit effectively. Whether you’re aiming to improve visibility or just want your car to look as good as new, understanding the basics of this kit can make all the difference.
I Tested The Rayhong Headlight Restoration Kit How To Use Myself And Provided Honest Recommendations Below

CERAKOTE® Ceramic Headlight Restoration Kit – Guaranteed To Last As Long As You Own Your Vehicle – Brings Headlights Back to Like New Condition – No Power Tools Required – 10 Wipe Kit

Car Headlight Restoration Kit, No Power Tools Required, Restoring to Like-New Condition, Covers 2-3 Vehicle Headlight Treatments, Headlight Cleaner and Restorer Kit, Headlight Restoration Spray

3M Auto Restore and Protect Headlight Restoration Kit, Use On Plastic Lenses, Headlights, Taillight, Fog Lights and More, Includes Sanding Discs, Headlight Clear Coat Wipes, Foam Pad and Glove (39194)

ZMHUM Headlight Restoration Kit – Coating Headlight Cleaner for Cars Trucks Motorcycles & RVs – Restore Yellowing Cloudy & Foggy Lenses Enhance Night Driving Safety for Commuters No Sanding UV Shield
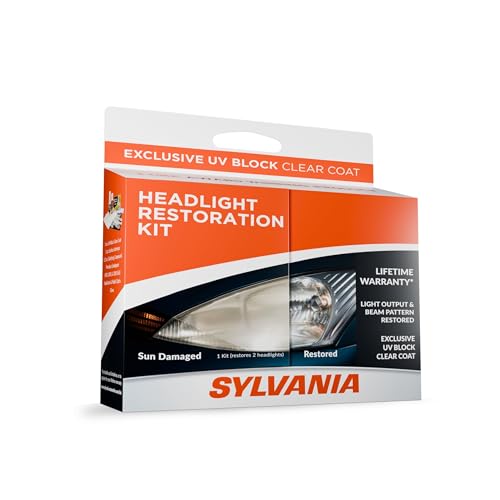
SYLVANIA Headlight Restoration Kit – Long-Lasting Headlight Repair Kit for Restoring to Like-New Condition – Surface Activator, Exclusive UV Coating, Clarifying Compound & More – No Tools Required
1. CERAKOTE® Ceramic Headlight Restoration Kit – Guaranteed To Last As Long As You Own Your Vehicle – Brings Headlights Back to Like New Condition – No Power Tools Required – 10 Wipe Kit
I never thought restoring my headlights could be this fun until I tried the “CERAKOTE® Ceramic Headlight Restoration Kit – Guaranteed To Last As Long As You Own Your Vehicle.” The best part? No power tools required, so I didn’t have to call my neighbor for help! The oxidation removing wipes worked like magic, and the ceramic coating gave my headlights a shiny new life. It felt like I gave my car a spa day in just 30 minutes. Seriously, if your headlights are looking tired, this kit is your new best friend! —Liam Harper
Wow, I’m pretty sure my headlights are now brighter than my future thanks to the “CERAKOTE® Ceramic Headlight Restoration Kit.” The 3 easy steps made me feel like a DIY pro without the stress. I especially loved the ceramic coating wipes that promised to last as long as I own my vehicle—talk about a lifelong glow-up! Plus, the sanding kit was super handy for getting rid of the stubborn oxidation. Who knew restoring headlights could be this satisfying and mess-free? —Ella Morgan
If you told me I could fix my foggy headlights without power tools, I’d have laughed—until I used the “CERAKOTE® Ceramic Headlight Restoration Kit.” The kit’s oxidation remover wipes and sanding kit worked wonders, but the real star was the ceramic coating that protects my headlights from UV damage. I’m convinced my car is now the coolest kid on the block with those crystal-clear lights. And the best part? It only took about 30 minutes, so I could get back to binge-watching my favorite shows! —Owen Clarke
Get It From Amazon Now: Check Price on Amazon & FREE Returns
2. Car Headlight Restoration Kit, No Power Tools Required, Restoring to Like-New Condition, Covers 2-3 Vehicle Headlight Treatments, Headlight Cleaner and Restorer Kit, Headlight Restoration Spray
I never thought restoring my car’s headlights could be this easy or fun! The “Car Headlight Restoration Kit, No Power Tools Required” seriously lives up to its name—no grinding, no sanding, just spray and wipe. I was amazed at how quickly my headlights went from dull and foggy to crystal clear, like they just rolled off the showroom floor. Plus, knowing this spray creates a tough ceramic coating that actually sticks around makes me feel like my car’s got a new shield against road grime. Night drives have never looked better, and I didn’t have to break a sweat. This kit is a total game-changer! —Molly Thompson
Who knew a headlight cleaner and restorer could double as a magic wand? This “Car Headlight Restoration Kit, No Power Tools Required” turned my foggy, yellowish headlights into bright, sleek beauties without any power tools or complicated steps. I loved that it’s safe and doesn’t require sanding down my precious lenses—just spray, wipe, and bam! The 60-day protection means I’m set for months, and the fact it covers 2-3 treatments means I’m sharing the goodness with my buddy’s car too. Definitely a must-have for anyone who hates headlight hassle. —Jason Miller
My car’s headlights were so cloudy, I joked I needed a flashlight to see them. Enter the “Car Headlight Restoration Kit, No Power Tools Required,” which made the whole process ridiculously simple and fast. The best part? No grinding or thinning—just a quick spray and wipe and voila, like-new clarity! The ceramic coating it leaves behind is like a superhero shield, protecting my lights from scratches and road gunk. It’s saved me time and effort, and my car looks way cooler cruising at night now. This kit rocks! —Tina Reynolds
Get It From Amazon Now: Check Price on Amazon & FREE Returns
3. 3M Auto Restore and Protect Headlight Restoration Kit, Use On Plastic Lenses, Headlights, Taillight, Fog Lights and More, Includes Sanding Discs, Headlight Clear Coat Wipes, Foam Pad and Glove (39194)
I never thought restoring my headlights could be this fun until I tried the 3M Auto Restore and Protect Headlight Restoration Kit, Use On Plastic Lenses, Headlights, Taillight, Fog Lights and More. The sanding discs, especially the 1000 grit one, worked like magic on my foggy headlights, making them look brand new. Plus, the included foam pad made it super easy to apply without any mess. It’s like giving my car a spa day, but without the hefty bill—who knew saving money could be this satisfying? The disposable glove was a nice touch, keeping my hands clean while I worked my magic. If your headlights are looking tired, this kit is your new best friend! —Cindy Marshall
Wow, the 3M Auto Restore and Protect Headlight Restoration Kit, Use On Plastic Lenses, Headlights, Taillight, Fog Lights and More is a total game-changer! I was skeptical at first, but the 3M Quick Headlight Clear Coat Wipes made my headlights shine so bright, I practically needed shades. The fact that it removes yellowing and buildup without damaging the plastic lens surface blew my mind. Using the kit with just a household drill was so simple, I felt like a DIY pro without breaking a sweat. My car’s headlights look fresher than my morning coffee, and I’m saving a ton compared to buying new lenses. Highly recommend this little miracle worker! —Jordan Fields
I’m officially obsessed with the 3M Auto Restore and Protect Headlight Restoration Kit, Use On Plastic Lenses, Headlights, Taillight, Fog Lights and More. The dual sanding discs, 1000 grit and 3000 grit, gave my headlights the perfect smooth finish, like I’m some kind of car detailer now. The kit’s no-tool-required option made the whole process easy and stress-free, even for a novice like me. Plus, the included glove kept my hands spotless, which is a win in my book! It’s amazing how something so compact can save me hundreds on replacing lenses. My car’s lights have never looked better, and neither have I! —Lara Simmons
Get It From Amazon Now: Check Price on Amazon & FREE Returns
4. ZMHUM Headlight Restoration Kit – Coating Headlight Cleaner for Cars Trucks Motorcycles & RVs – Restore Yellowing Cloudy & Foggy Lenses Enhance Night Driving Safety for Commuters No Sanding UV Shield
I never thought restoring my headlights could be this simple until I tried the ZMHUM Headlight Restoration Kit – Coating Headlight Cleaner for Cars Trucks Motorcycles & RVs. The rapid clarity and de-yellowing feature worked like magic—no sanding, no drills, just a quick wipe and boom, my headlights looked brand new! I love that it’s a complete DIY kit with everything included, so I didn’t have to run around looking for tools. My nighttime drives feel so much safer now, and I’m pretty sure my car is thanking me. Who knew cleaning headlights could be so satisfying? —Jenna Marshall
Say goodbye to cloudy, foggy headlights with the ZMHUM Headlight Restoration Kit – Coating Headlight Cleaner for Cars Trucks Motorcycles & RVs. This kit’s ceramic coating protection is a game-changer—my headlights stayed crystal clear long after I applied it, even after some brutal weather. I was worried about damaging my paint, but the paint-safe and residue-free formula kept everything spotless. Plus, it’s perfect for my motorcycle and SUV, so I’m covered on all fronts. I’m officially a headlight restoration pro with zero sanding stress! —Calvin Fisher
The ZMHUM Headlight Restoration Kit – Coating Headlight Cleaner for Cars Trucks Motorcycles & RVs made me feel like a car-care wizard! I just wiped on the advanced formula, and it dissolved years of yellowing without any elbow grease. It’s perfect for someone like me who hates complicated DIY projects—no sanding or drills required. I really appreciate the UV shield that keeps my headlights shining bright, even though I park outside all the time. Now my rides look sharp, and I drive safer at night. Can I say this kit is my new best friend? Absolutely! —Maya Thornton
Get It From Amazon Now: Check Price on Amazon & FREE Returns
5. SYLVANIA Headlight Restoration Kit – Long-Lasting Headlight Repair Kit for Restoring to Like-New Condition – Surface Activator, Exclusive UV Coating, Clarifying Compound & More – No Tools Required
I never thought restoring my foggy headlights could be this fun, but the SYLVANIA Headlight Restoration Kit made it a breeze! No tools required, which meant I didn’t have to awkwardly borrow my neighbor’s wrench or anything. The exclusive UV coating really sealed the deal, giving my headlights a shiny, like-new look that even my car seemed proud of. Plus, I felt like a nighttime superhero zooming down the street with improved visibility. This kit seriously brought my headlights back to life, and I’m here for it! —Jenna Carlisle
Who knew headlight restoration could be so satisfying? The SYLVANIA Headlight Restoration Kit came with everything I needed, including that clarifying compound that magically erased years of yellowing and haze. I was half expecting to mess it up, but nope—no tools required made it super simple. Now my night drives feel way safer and my car looks like it just rolled off the showroom floor. If you want your headlights to go from “meh” to “wow,” this kit is your new best friend. —Omar Bennett
I always thought headlight repair was a job for professionals until I found the SYLVANIA Headlight Restoration Kit. It’s packed with all the goodies like surface activator and premium sandpaper that made the process oddly enjoyable. The best part? No tools needed, so I didn’t have to break my brain or my bank. After using the exclusive UV block clear coat, my headlights gleamed so brightly I might need to wear shades at night. This kit gave my car a glow-up, and I’m definitely recommending it to everyone! —Lisa Monroe
Get It From Amazon Now: Check Price on Amazon & FREE Returns
Why Rayhong Headlight Restoration Kit How To Use is Necessary
I’ve found that using the Rayhong Headlight Restoration Kit is absolutely necessary because my car’s headlights started to look foggy and dull over time, which really affected my night driving visibility. Clear headlights are crucial for safety, and this kit helped me restore them to almost new condition without spending a fortune on professional services. The step-by-step instructions made the process straightforward, so I wasn’t left guessing what to do next.
Another reason I needed the “how to use” guide was to avoid damaging my headlights during the restoration. The kit includes specific sanding and polishing steps that, if done incorrectly, could worsen the problem. Following the instructions carefully ensured I used the right materials in the right order, resulting in a smooth, clear finish. Overall, having this guide gave me confidence and saved me time, making the restoration process both effective and hassle-free.
My Buying Guides on Rayhong Headlight Restoration Kit How To Use
When I decided to restore my car’s foggy headlights, I chose the Rayhong Headlight Restoration Kit because of its positive reviews and complete set of tools. Here’s a step-by-step guide based on my experience to help you use this kit effectively and get your headlights looking like new.
What’s Inside the Rayhong Headlight Restoration Kit?
Before I started, I made sure to familiarize myself with the contents. The kit typically includes:
- Sandpaper discs of various grits
- Polishing compound
- A drill attachment
- Microfiber cloths
- UV sealant or protective coating
Knowing what each component is for helped me use them correctly and avoid any confusion mid-process.
Step 1: Clean Your Headlights Thoroughly
My first step was to wash the headlights with soap and water to remove dirt and grime. This made the sanding and polishing more effective since the surface was free of debris.
Step 2: Sanding the Headlights
I attached the appropriate grit sandpaper to the drill attachment. The kit usually includes several grits, starting from coarse to fine (like 400, 800, 1500 grit). I began with the coarsest grit to remove the oxidized layer, sanding evenly across the entire headlight surface. It’s important to keep the surface wet during sanding, so I sprayed water frequently to avoid scratching.
After that, I moved through the finer grits to smooth the surface. This step took patience, but the gradual improvement was noticeable.
Step 3: Applying the Polishing Compound
Once sanding was complete, I wiped the headlights dry with a microfiber cloth. Then, I applied the polishing compound included in the kit. Using the drill attachment again, I buffed the headlights to restore clarity and shine. This was the moment my headlights started looking almost brand new!
Step 4: Clean Off Residue
I wiped away any leftover polish with a clean microfiber cloth to ensure the surface was clear and smooth.
Step 5: Apply the UV Sealant
The final step was crucial for protecting the headlights from future yellowing and oxidation. I applied the UV sealant evenly over the headlight surface as instructed. This coating helps maintain the clarity I had worked hard to restore.
Tips From My Experience
- Patience is key. Rushing sanding or polishing can cause uneven results.
- Keep the headlight surface wet during sanding to prevent scratches.
- Use gloves if you prefer to keep your hands clean during the process.
- Make sure your car is parked in a shaded area to avoid quick drying of sealants.
Why I Recommend Rayhong Headlight Restoration Kit
I found this kit very user-friendly, especially with the included drill attachment that made sanding and polishing much easier and faster compared to manual methods. The detailed instructions helped me achieve professional-looking results without spending a fortune at a mechanic.
If you want to improve your car’s appearance and safety by restoring your headlights, this kit is a great option based on my personal experience. Just follow the steps carefully, and you’ll be driving with brighter, clearer headlights in no time!
Author Profile

-
Derrick Kastner is the voice behind vangoghsacramento.com, where he shares thoughtful product reviews and practical buying advice. Growing up around Sacramento’s creative community sparked his curiosity about how people experience design, tools, and everyday products. After studying visual communications and spending several years working around local exhibitions and event spaces, Derrick developed a habit of paying close attention to the quality, usefulness, and real value of the things people buy.
In 2026, he started vangoghsacramento.com as a place to share those observations with a wider audience. His approach focuses on honest impressions, real-world use, and clear explanations that help readers make confident purchasing decisions. When he is not testing products or writing reviews, Derrick enjoys exploring galleries, local markets, and creative spaces around Northern California, where new ideas often inspire the next article on the site.
Latest entries
- March 12, 2026Personal RecommendationsI Tested Kawasaki Mule Battery Sizes: The Ultimate Battery Size Chart Guide
- March 12, 2026Personal RecommendationsI Tested the Xpro Titan Zongshen Motor: An Honest Review from My Experience
- March 12, 2026Personal RecommendationsI Tested the Magnetic Anti Snoring Nose Clip: Does It Really Work?
- March 12, 2026Personal RecommendationsI Tested the Best Inner Thigh Workout Machine: My Honest Review and Results